In this step-by-step guide I’ll show you exactly how to build a church website you can be proud of.
And don’t worry! It’s really not as hard as you think (I promise).
Follow this guide and you’ll have your church website set up in the next few minutes.
Understatement of the 21st Century:
Your church website is important.
Before someone ever steps foot in your church building, they’re searching for your church in Google.
Most people will make the decision on whether or not to visit your church for the first time based on your church website.
- In 2012, 46% of church attendees said that a church’s website was important in picking a church to visit (Source).
- 33% of people said that the internet was the first place where they learned about their church (Source).
What’s the takeaway?
Having a poorly designed church website, or not even having a church website at all can hinder church growth and put a limit on the number of first-time visitors your church will get.
It’s not fair, is it?
You could have the best children’s ministry and be preaching great sermons week after week and yet people judge your church by your website.
2 Reasons Your Church Should Have A Website
- It’s most often your church’s all-important first impression. People will decide whether or not to visit your church within 10 seconds of landing on your site.
- It’s never been easier to start a church website. In today’s world of WordPress templates, the need to be a coding expert is over. Even normal people like you and me can do it!
So if you’re ready, here’s your step-by-step guide for building a church website today.
2 Things You’ll Need To Get Started
- A credit or debit card (to pay for hosting)
- 30 minutes to set up everything
If you’re ready, let’s get to it!
Step 1. Choose Between A Free Or Paid Domain
While it’s possible to start a free church website using free platforms like SiteRubix on a sub-domain, I highly recommend buying your own church domain.
For me it’s a no-brainer – always start your blog on a solid foundation with your own domain.
Here’s what a free sub-domain looks like: yourchurchname.siterubix.com
Here’s what your self-hosted WordPress domain will look like: mychurch.com
And it’s not just the website domain name that changes. With a free website you have limited creative control, the potential for ads to be plastered all over your site. Not good.
For the sake of $3.95 a month for hosting, you give your visitors a credible first impression with a professional look, whilst at the same time, having the freedom and control to have exactly the kind of site your church needs.
This is exactly why in this step-by-step guide I’m going to show you how to start your church website the exact way I build all my sites.
Let’s move on to step 2…
Step 2. Set Up Your Domain & Hosting
If your website is the house you’ll be building, the domain is your online address and your hosting is the land you’re building it on.
So before you go ahead and buy a domain name, you’ll need to set up hosting.
I recommend Bluehost Web Hosting as they offer free domain registrations for the first year.
I also recommend them because I personally use Bluehost to host GrowChurch (if you’re I’m going to recommend website hosting I better be using them myself, right?)
Worth remembering: Bluehost offers a special price for GrowChurch readers: only $3.49 a month. That’s a phenomenal price.
A few more reasons BlueHost is the best place for hosting your church website…
- Bluehost’s Tech Support is 24/7. It’s easy to contact US-based tech experts via phone, live chat, or by raising a support ticket. These people know what they’re doing. Speaking from experience, when you ask a question, you can expect a good and quick answer.
- Bluehost’s pricing is unbeatable. Bluehost offers a special price for GrowChurch readers: only $3.49 a month. That’s a phenomenal price.
- Their web hosting is the most reliable. They’ve been around since 1996 and are always innovating. Bluehost hosts thousands of church websites and are the most popular web hosting service provider out there.
- Money-Back Guarantee. Bluehost offers a 30-day money-back guarantee, so there’s no risk if you change your mind about your church’s website.
Please note that this post contains affiliate links. If you sign up to BlueHost I will receive a small commission at no extra cost to you.
The first thing I did was go to Bluehost and click the “Sign Up Now” button.
This will take you to this page with two options:
You can check the availability and register your desired church domain.
I always recommend a .com domain extension if at all possible – Google just likes it and you’ll find it easier to rank in the search engines going forward.
If you’ve already got a domain, BlueHost can host it for you and it’s easy to transfer over. You can still install WordPress and have your church website looking beautiful, so don’t worry.
On the next screen, you’ll need to fill out your personal information and then select your web hosting package:
You’ll see Bluehost’s web hosting packages range from $5 to $7 per month and change according to how long you want to register your domain for.
You can register for one, two or three years – basically it’s cheaper the longer the time period.
After you’ve gone ahead and registered your unique and new blog domain, you’ll see a confirmation email pop up in your inbox which will tell you all you need to know to move to the next step.
Step 3. Install WordPress
So, once you’ve launched your Bluehost account, you’re just a few clicks away from WordPress installation.
Although “install” might sound like a scary word, really it just means “click a few buttons”. Plus I’m going to walk you through every step so we’ll get this done in the next 20 seconds.
Ready?
First, visit my.bluehost.com and sign in using your new login and password. Click “website” under “hosting”:
Then simply click the “Install now” link under “WordPress”:
Welcome to the “One Click Install” page. Because you’re awesome and we’re going through this together, under “do it yourself (FREE)” you can go ahead and click “Install”:
Here you just select the new domain you’ve just registered:
Next, I recommend you don’t skip this step but take time to read and accept the terms and conditions. Click “Install Now”:
Give it a sec and…. wait for it….. your WordPress install is complete! Congratulations! See, that wasn’t as bad as you thought was it? : )
Now onto the next step… making your church website look beautiful!
Step 4. Choose Your Theme
This is the fun bit – choosing your theme!
A theme can make or break your blog, choosing a WordPress theme allows you to control the look and feel of your site.
When deciding which theme to go with moving forward, you’ll want to pick a theme that’s crisp, clean professional.
Most importantly, you’ll want a theme that gives you the freedom and flexibility, options and complete control over the look and appearance of your church’s website.
If you’re not a HTML coder or programmer (I’m definitely not), then a theme that does all the work for you and makes the design work a million times easier is what you’re looking for.
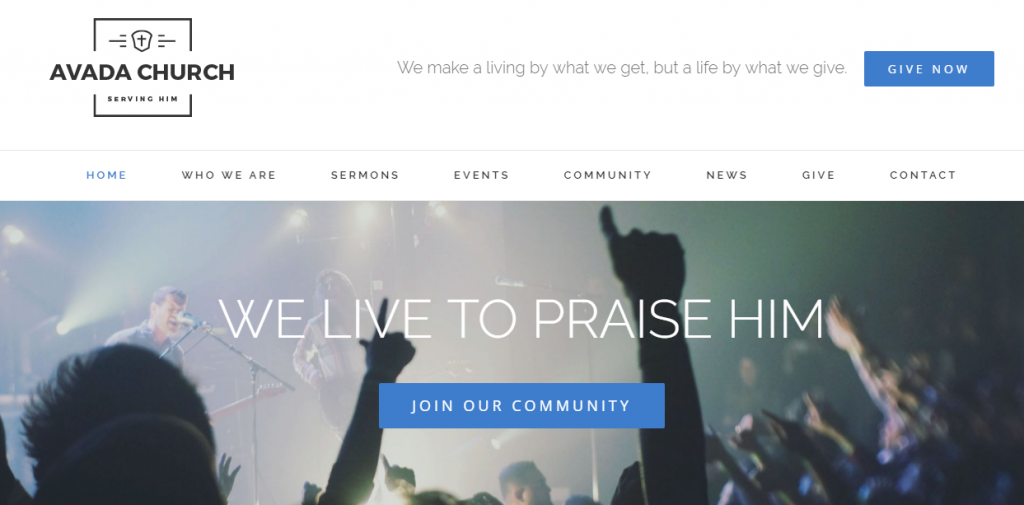
The Avada Church Website Theme
There are several premium WordPress themes available out there, but the Avada is without a doubt the best choice for pastors and church leaders.
The Avada WordPress theme has been the top-selling WordPress theme for three years running. 240,000+ people have created stunning sites with Avada – including GrowChurch.net.
And for good reason… when it comes to giving you options and giving you full control and customisation options of your blog, Avada is unbeatable.
The Avada Church Website Theme, specifically designed for churches, gives your church a professional first impression.
Avada Church comes with an events calendar, a countdown to your next celebration, a way to donate to your church online and the ability to stream your services live or upload your sermons.
Remember, everything is easily customised so you can get the exact look your local church needs.
Check out the Avada Church Theme live demo here.
Simply go to ThemeFusion and purchase your Avada Church WordPress theme ($59.00).
Step 5. Installing your new WordPress theme
Before you start panicking, remember just how easy it was in install WordPress?
Well, installing your theme is even easier.
First, log in to WordPress:
Then, in your WordPress dashboard, go to Appearance > Themes and click the “Install Themes” tab, followed by the “Upload” link.
Then, click “Choose File,” select your avada.zip file (which you downloaded when you purchased Avada in step 4) and press “Install Now.”
Once it’s installed, your theme is ready to activate! Simply click activate and you’re all set.
Your church website is LIVE!
Go ahead, type in your church’s new domain into the address bar. Can you see it?
Sure, there’s tweaks and personalisations you’ll make as you go and you’ll want to flesh out your site by adding content and blog posts – but your foundation is firmly in place.
The next two steps are crafted to help you just that…
Step 6. Installing WordPress Plugins
Plugins are basically add-ons to the functionality of your site.
With Avada, there’s only a few plugins you’re going to need.
If you can think it, there’s probably a WordPress plug in for it. There are literally tens of thousands of plugins within the Wordpress network and you can definitely use any of these.
A word of caution: Too many plugins, can slow down your site so be selective. I only use a few plugins at The Make Money Online Blog (see below).
In your WordPress dashboard navigate to Plugins > Add New and search for, install, and activate the following free plugins one by one:
- Akismet has a funny name but serves a great purpose in preventing your blog from getting comment spam (which is pretty prevelant). It’s like a spam filter that blocks comments that are coming into your website through automated bots and spammers. (Highly recommended)
- All-in-One SEO Pack gets your site ready for ranking in the search engines such as enabling you to as adding meta tags and geenrating an XML sitemap you can upload to Google webmaster tools. This helps Google find your site and rank it. (Highly recommended)
- Shareaholic Share Buttons make it easy for your readers to share your content. See the nice floating share buttons on the left? They’re free from Shareaholic.
Finally, so people can receive our blog posts via email, AWeber is a great tool for building your email list.
(Psssst…. if you don’t already subscribe to GrowChurch via email, you can here.)
Step 7. Tinker Until You’re Happy
You’re done. But this is actually where the fun begins. Now that you have your own blog, you get to make it yours; you get to turn your vision into a reality. So tinker away:
- Experiment with different colour palettes.
- Add some photos of your church ministries; children, youth, Sunday morning service, small groups etc. (pro tip: when you get a chance, get some professional photos taken; they’re well worth the cost).
- If your church does not yet have a logo, unless you’re a Photoshop pro, it’s easy to get someone else to do it for you at sites like Fiverr.com. I use Fiverr all the time and it’s super easy to have a great looking logo done for a phenomenal price.
- Determine whether or not you want comments on your church blog.
- Establish a social media presence for your church on Twitter, Facebook, Pinterest, Google+ etc.
- Keep tinkering until you’re happy you’ve got the right look.
- And, of course, start writing new blog posts and publish them. Share them on your church Facebook page.
Congratulations!
Well done on setting up your church website from scratch! You’ve done it!
Give your self a MASSIVE pat on the back, you should be feeling very good about yourself right about now.
GrowChurch Champs, I’d really love to hear your feedback on this, or better still, why not share your church website link in the comments below and share best ideas?
What do you need to know about running a successful church website?
Here’s to promoting your church online and giving your potential visitors that all important first impression.
Thank you for this information. You are blessed.
You make it look so easy.
This site is very well resourced
Thanks Kav, the truth is, with the right WordPress theme and template anyone can have a website up and running – in fact, it’s never been easier to get a church website up and running.